Showing posts with label splendid fiins. Show all posts

Monday, June 24, 2013

Returning to Basics - A Father's Day Mini Album

I sometimes feel like my evolution as a scrapbooker mimics my evolution as a home cook.  Before I was married and with kids, I insisted (with my wanna-be Martha Stewart assertiveness) that good meals had to be made from scratch.  To make the Thanksgiving stuffing, I use homemade bread, homemade chicken stock, and even insist on using home grown herbs.  Obviously, with a husband that always seems to be gone at sea and two little ones, I'm unable (and unwilling) to go to such extremes in the kitchen.  I reach for my Stovetop Stuffing with no hesitation these days.  That same reality check applies to the craft room.

Once upon a time, I would spend hours or days on a single layout, thinking that it had to mimic those gorgeous creations I saw on the manufacture blogs or in the magazines. While I still enjoy making those mini pieces of art every once in awhile, I have realized that the heart of this hobby for me is the memory keeping.  It's putting those layouts onto a page and into my albums for my family to enjoy.  It's taking those photos off of my hard drive and into albums.  It's about making stories from the past tangible in the present. 

While this mini album I made for father's day is nothing fancy, it represents what I love about this hobby.  I love taking beautiful photos of my family.  I love using digital tools like Rad Lab and digital brushes to make these photos look cool and special.  I love using up my scrapbooking stash.  I love projects that are super simple to put together and easy to enjoy. 


To make this album, I started off with this super cheap photo album from Target.  You probably have a ton of these lying around your house.  I bought mine for around $2.

I then removed the front and back cardboard covers and replaced them with these Project Life style cards by Splendid Fiins (Hello Daddio Collection) that I printed out on my home computer.  Note: when you buy the digital kit, you get a bunch of JPEG files that you can easily print to any size you want a home.  I personally used Photoshop to resize the card files to fit my album and then printed them on glossy photo paper.


For the journaling pages inside the album, I just used the journaling cards from my Simon Says Stamp June Card Kit.  They were sized perfectly to fit the 4x6 openings and included plenty of journaling space.  And when I did spend some time embellishing the cards, I just reached for the stamp set in the card kit (from Kelly Purkey) and some other father's day themed ones that I had on hand (including Lawn Fawn Dad's Day).


For the photos in the album, I quickly edited them using Photoshop and Rad Lab.  In many of them, I also added various "digital brushes" (i.e., the word art) directly onto the photo before printing.  The brushes I used were from Splendid Fiins (Spot On Collection) and Simple Scrapper (Stories of Summer Toolkit). 
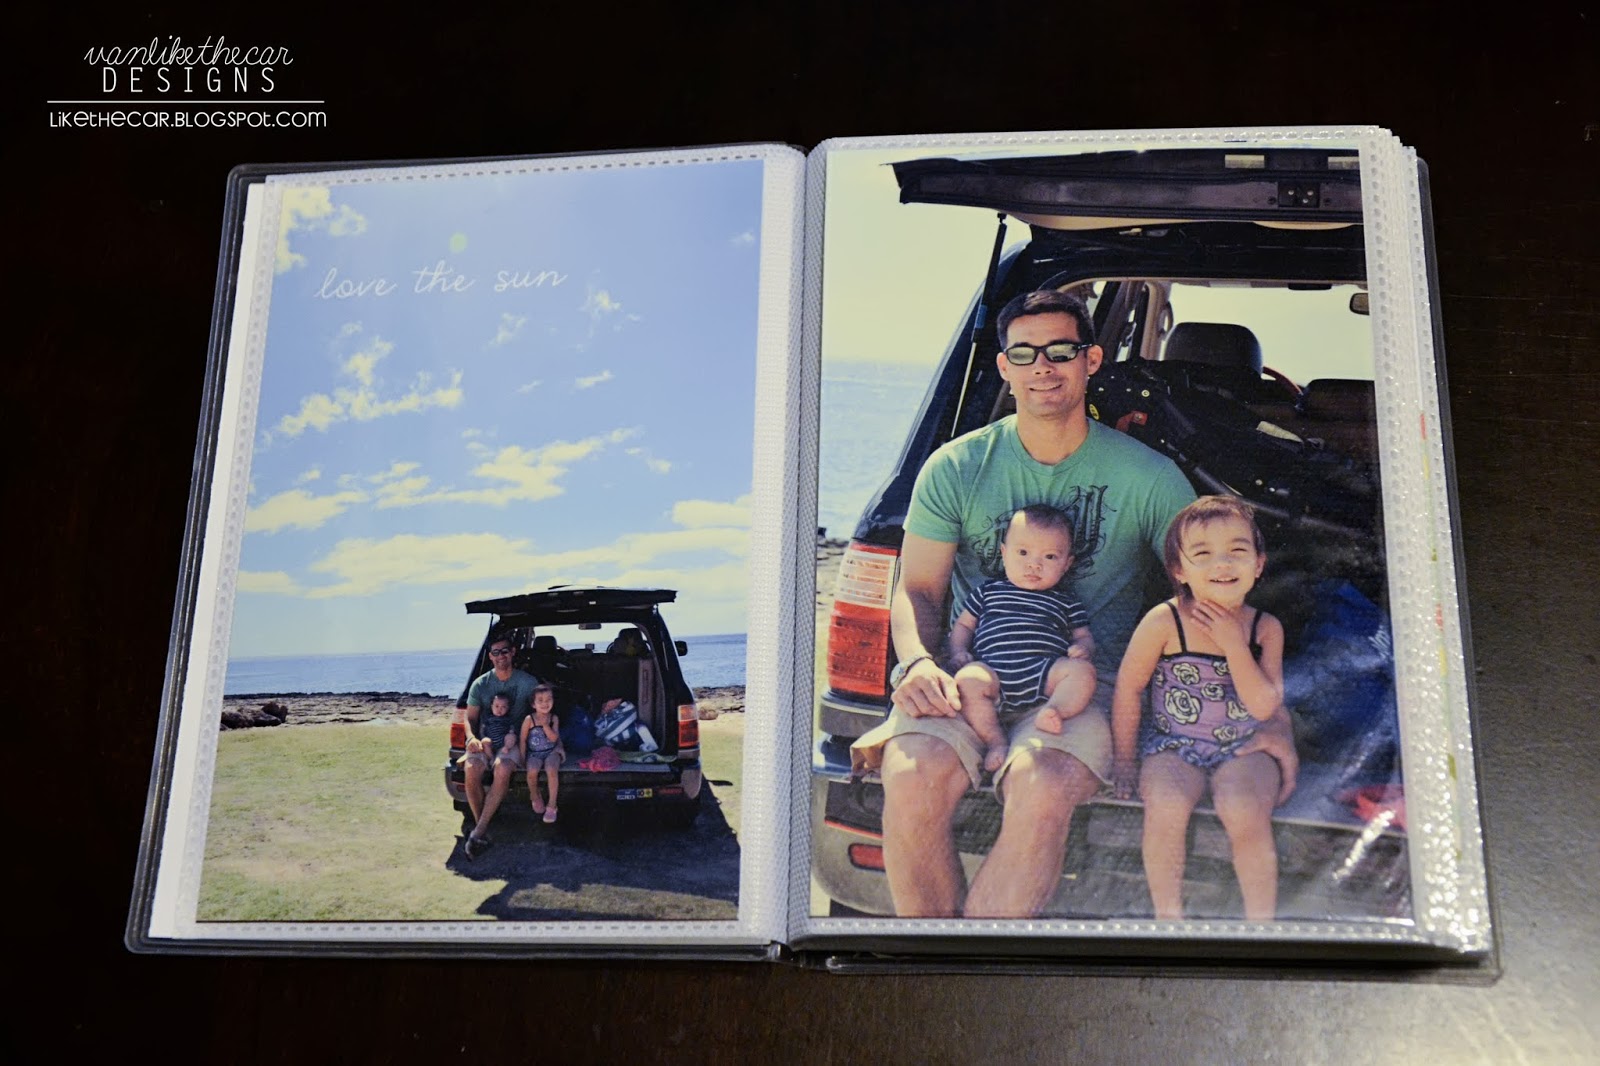

The longest part of this process was selecting the photos and editing/ printing/ cutting them.  I think if I had spent more time on the journaling cards, it might have been a bit fancier.  But I ultimately knew that it was for my husband and I just wanted him to have something to keep on the ship when he was at sea.  So keeping it quick and simple was perfect.

Here are photos from the rest of the album.  There are a lot of photos so beware...  :)


I know that it's simple but I genuinely loved this mini album.

As always, thanks so much for stopping by!!!!

Sunday, June 9, 2013

Xyron and Epiphany Crafts Blog Hop


It's time for another amazing blog hop with Xyron and this week they are teaming up with Ephiphany Crafts!!!!!  I am a tool and gadget junkie when it comes to my crafting and the tools by Ephiphany Crafts are a MUST HAVE STAPLE for any DIYer.  With their amazing tools, you can customize anything from simple embellishments to even jewelry charms.

A.  Photo Charm.  The first project I have is a super simple but cute ribbon necklace I made for my daughter.


Supplies:  To make this necklace, you will need the following supplies:  Xyron 1.5" Create-a-Sticker (Permanent Adhesive); Ephiphany Crafts (Shape Studio Tool Heart 25, Bubble Caps Heart 25, Metal Charms Heart 25); American Crafts Ribbon.

1. Size Down and Print Your Photos.  Choose a photo that is approximately 28 mm x 28 mm large (to fit inside the heart shape of the Epiphany Crafts Shape Studio Tool Heart 25).  Note: I resized my image in Photoshop and then printed them at home using photo paper.


2.  Punch Out Photo/ Image.  Using the Ephiphany Crafts Shape Studio Tool Heart 25, cut out a heart shape from the photograph.


3.  Adhere the Bubble Cap.  Leave the heart shape inside the heart tool, place a heart bubble cap on top of the image and inside of the tool, and then close the lid and press down to adhere the bubble cap onto the photograph.


4.  Apply Adhesive onto the Heart Bubble.  Run the heart bubble through the Xyron 1.5" Create-a-Sticker.


5.  Place Heart Bubble into Charm Setting.  By simply removing the adhesive backing from the heart bubble, you can then simply place the heart inside the Ephiphany Crafts Metal Charm Setting to create the most adorable and customized charm!


Since I'm not a jewelry maker, I simple ran a piece of cute ribbon through the charm to create a super cute necklace for my daughter.  And since it was so easy, I was able to quickly make a second one for her to give to her friend.


B.  Custom Embellishments for Cards.  I also love how the Ephiphany Crafts tools let me fully utilize my digital scrapbooking supplies to make custom embellishments, perfect for scrapbook layouts or cards.  For these next two cards, I printed some digital stamps (in coordinating colors with my patterned paper) on matte photo paper to make these flair-like circle embellishments.


For my other supplies, I stuck with my Simon Says Stamp June Card Kit (which I am a brand new subscriber to).  I also created some smaller circle embellishments by cutting out images from the patterned paper with the Epiphany Crafts Studio Shape Tool Round 14.

1.  You're the Best Card.  


Supplies:  Ephiphany Crafts (Studio Shape Tool Round 25 and 14, Bubble Caps Round 25 and 14); Adhesives (Xyron 1.5" Create-a-Sticker, Xyron Mega Runner); Patterned Paper and Die Cuts (Basic Grey - Hipster Collection); Stamps (Amuse Studio); Wood Veneer (Freckled Fawn); Heart Sequin and Brad (Doodlebug Designs); Hello Word Art (Splendid Fiins - Spot On).

Here is a close up of the custom embellishments (which easily fit through the Xyron 1.5" Create-a-Sticker).


2.  Where in the World Card.  


Supplies:  Epiphany Crafts (Studio Shape Tool Round 25 and 14, Bubble Caps Round 25 and 14); Adhesives (Xyron 1.5" Create-a-Sticker, Xyron Mega Runner); Patterned Paper and Die Cuts (Basic Grey - Hipster Collection); Stamps (Kelly Purkey - Dude); Wood Veneer (Freckled Fawn); Hello Word Art (Splendid Fiins - Spot On).

With the "hello lovely" circle, I used the Round 25 tool as just a circle punch and opted not to cover it in a bubble.  I love it when my tools have multiple functions!  And here is a close up.


Remember to stop by the Xyron Blog and Xyron Facebook Page all week to see what other awesomeness and giveaways are going on!

As always, thanks for stopping by!

Friday, April 26, 2013

Project Life 2012 - Week 18

So I started Project Life after Thanksgiving 2011 and my track record has been a bit hit and miss.  Regardless, I still am committed to finishing 2012 and seeing 2013 through...eventually.  :)  So here is my Project Life 2012 Week 18 Layout using the new May Cards from Splendid Fiins. 


Sticking with these card kits really make it super easy for me to get everything done!


Supplies: Splendid Fiins (May Card Kit, 4x6 Horizontal Halvies, Script Day Stamps).


Here are the close ups.


As always, thanks for stopping by!!!  Aloha Friday!


Thursday, April 18, 2013

Project Life - Week 6

I love putting together my Project Life layouts whenever I can get around to them.  It is an opportunity to sort through my photos and play with the awesome monthly card kits by Splendid Fiins.  With Week 6, I stuck with Splendid Fiins' February Card Kit and the Project Life Template Design A.


The photos and stories relate to this Aloha Friday post.  And here are some close ups of the layout.


As always, mahalo for stopping by!

Thursday, April 11, 2013

Project Life - Week 5


Even though I still have quite a bit of catching up to do, I genuinely enjoy putting together my Project Life layouts when I get around to them.  Sticking with the different card kits from Splendid Fiins makes it super easy to coordinate everything too.  Here is Week 5.


Digital Supplies: Splendid Fiins (January Card Kit, Script Day Stamps, Rain Kit).

Here are the close ups.


As always, thanks for stopping by!

Wednesday, February 27, 2013

Project Life 2013 - Weeks 3 and 4

Here is the layout for Week 3 (still using products from Splendid Fiins).


Digital Supplies: Splendid Fiins (January Card Kit, Script Day Stamps).


And here is Week 4 using the same supplies.


  Thanks for stopping by!
Related Posts Plugin for WordPress, Blogger...