Friday, June 14, 2013

Aloha Friday - Hikes and Hula Skirts


Aloha Friday, everyone!!!  Even though Justin is gone more these days, we still are able to sneak in some good ol' island fun.  I still can't believe we live in Hawaii!!!  So, as usual, here we go with mainly unedited photos and minimal commentary.  I'm sure Justin wishes he could ask for minimal commentary from me in real life.  :) 

1.  Honolulu Zoo - Military Appreciation Day.  Being from San Diego, I'm a bit of a zoo snob.  But the Honolulu Zoo is cheap and toddler friendly.  Recently, the zoo even offered free admission and a free lunch for all military members and their families.  It truly was such a nice event and the perfect way to spend an afternoon with the family.

Here's Benjamin trying some watermelon during our free lunch.


They had some acrobats performing on the lawn along with a bunch of vendor tents.


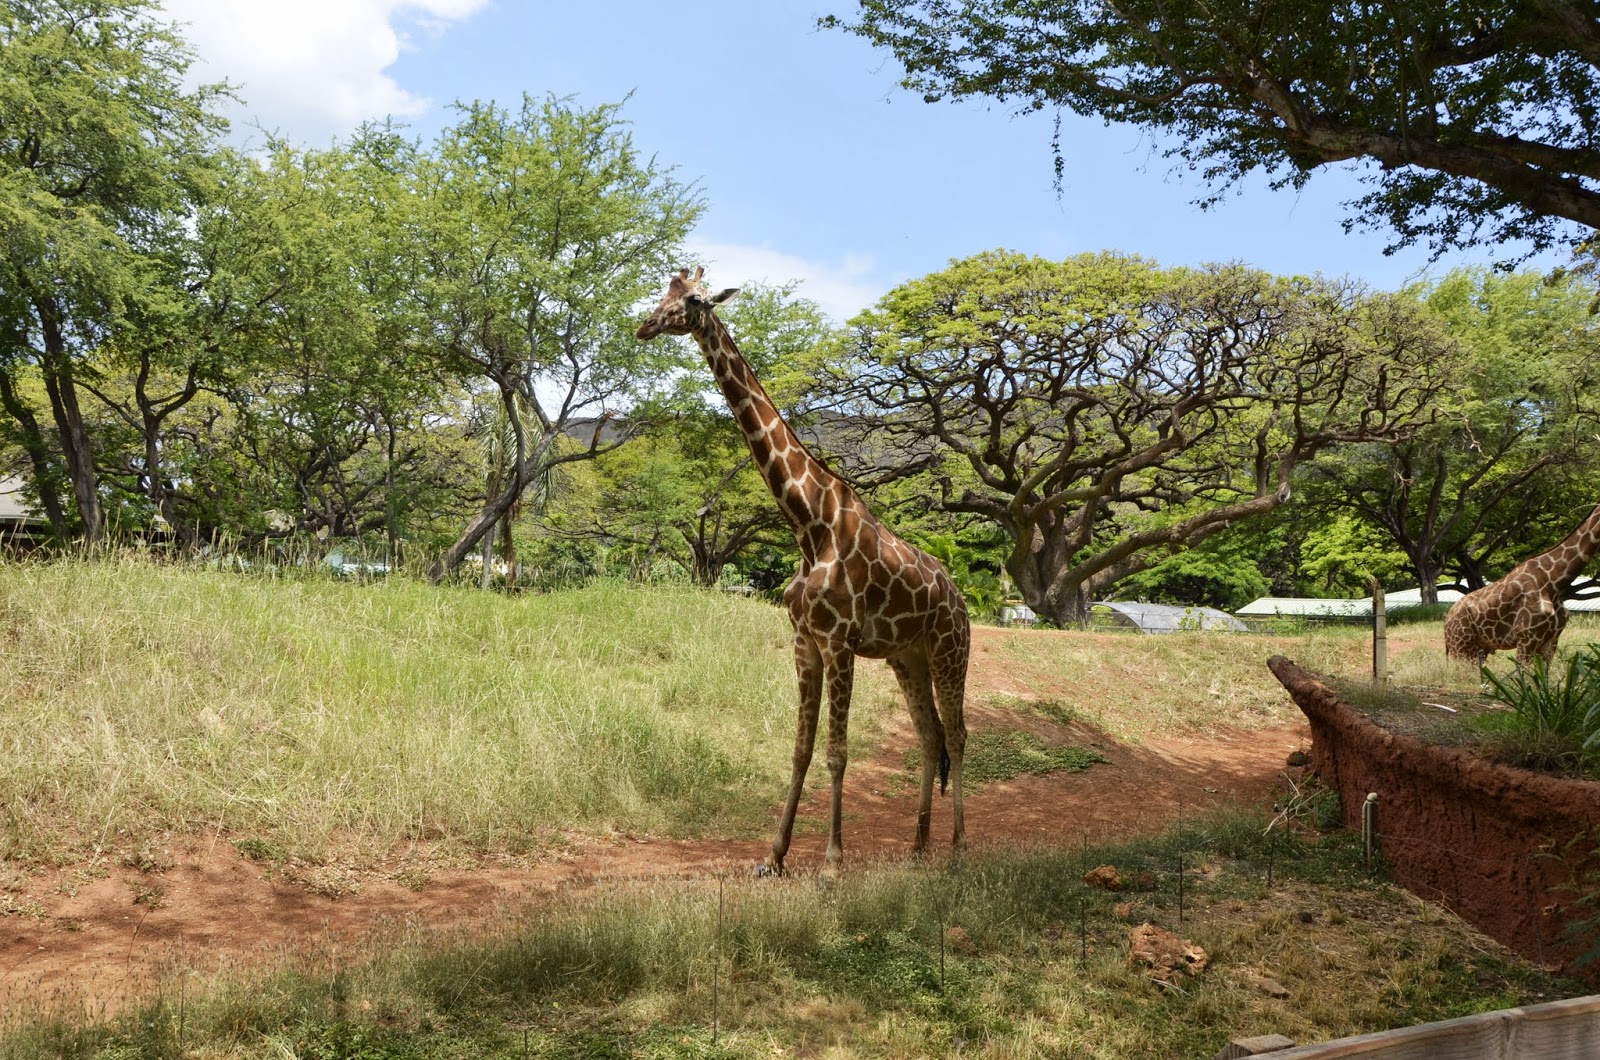
And since it was the zoo, there were some animals.  :)  Charlotte loves the giraffes!


2.  Turtle BeachSince my parents came to visit us recently, we revisited some old sites.  They're so beautiful though that it never seems to get old.  One our stop by Turtle Beach, there were a TON of turtles on the beach and in the water that morning!


3.  Makapu'u Lighthouse HikeI love this hike because you can push a jogging stroller the entire way up. 


And now it's my dad's turn to push.  :)


The views along the way and at the top of the point are also pretty spectacular.


And here I am with my mum.


4.  Paradise Cove LuauWe decided to try a different luau with my parents (we went to Germaine's with Justin's dad).  


Paradise Cove was more expensive and a more crowded.  However, there were so many activities to do before the dinner and actual show began.  There was an arts and crafts table where Charlotte made a hat and flower bracelet.


There were different games like spear throwing or bowling.  And after completing east game, Charlotte collected a little shell lei.


There were also a bunch of demonstrations like fish net throwing...
 

...coconut tree climbing...


...a short sunset hula show...


...and seeing them remove the kahlua pig from the oven.


And of course, there was the food and show. 


Charlotte just goes crazy over the luaus and is completely memorized watching the hula dances.  Good thing we have time for a few more luaus before we leave. 

5.  Bellows Air Force BeachI've heard so many people talk about Bellows and we finally made it out there over Memorial Day Weekend.  Um...wow.  I think it might be my favorite beach on the island now.


6.  Pali Lookout.  This is right off the Pali Pass and the view is incredible. 


7.  Hawaii State Fair.  So if I can be brutally honest, there isn't much going on at the Hawaii State Fair.  Charlotte loves the over priced food but it's small.  However...admission to the circus show that is included in your $3 ticket is worth EVERY.SINGLE.PENNY.  Who knew there was so much talent in a tiny little traveling circus?!  Really spectacular.


8.  Manoa Falls.  You have to pay $5 to park right at the trail head and the hike itself has some amazingly muddy spots.  Beware.  Seriously.  Like, I fell on my butt and twisted my wrist pretty badly muddy.  But it's beautiful.


9.  Teddy Bear World.  And finally, I took the kids to Teddy Bear World the other day.  Can someone say, AWESOME!!!  This place is hilarious.  Just check out the photos.  Charlotte's favorite part of the museum was the Elvis Bear show at the end!


And on that note, I think this post has gotten long enough.  For those of you that made it to the end, BRAVO!!!  As always, mahalo for stopping by!!!

Wednesday, June 12, 2013

Simon Says Stamp June Card Kit - Masculine Cards

I am now a proud member of the Simon Says Stamp Monthly Card Kit!  For months (like for almost two years now), I have enviously watched friends subscribe to all these fancy shmancy scrapbooking kit clubs like Studio Calico or Gossamer Blu.  If you have seen my craft closet under the stairs, you will understand why I just couldn't justify getting more stuff.  Well, I finally figured out a way to talk myself into a subscription kit (yeah, it wasn't that hard) and I couldn't be happier!

If you caught my last blog post, you already saw two cards I made with the kit featuring some awesomeness from Xyron, Ephiphany Crafts, and Splendid Fiins.  I love how quickly my cards came together with just the pieces from the kit, some reliable Xyron adhesive, and other basic supplies.  I am a slow crafter and you cannot believe how shocked I was when I made these six cards in less than three hours!  And thankfully, they are perfect for this week's challenge over at the Simon Says Stamp Challenge Blog (to create a masculine/ father's day card).  Make sure to check them out if you need some motivation to scrap or create!

1.  Fact Card.  The sentiment was totally inspired by this video I watched by Kristina Werner for Simon Says Stamp.


Other Supplies:  Xyron Mega Runner, DIY Foam Tape, Martha Stewart Border Punch, Tim Holtz Tiny Attacher, Uni-ball Signo Broad White Gel Pen.

2.  Do Something Awesome Card.  There are always so much cute sentiments in the Basic Grey snippets that come in the kit.  They remind me of the Elle's Studio tags.
 

Other Supplies: Xyron Mega Runner, DIY Foam Tape, Banner Pennant Stamp (Stampin' Up), WRMK Corner Rounder, Tim Holtz Tiny Attacher, Uni-ball Signo Broad White Gel Pen.

3.  Where in the World Card.  I love how a lot of the stamps in the Kelly Purkey Stamp Set can easily be combined to make a longer sentiment like this one here.  And those Kelly Purkey letter stamps are the PERFECT size for cards!
 

Other Supplies:   Xyron Mega Runner, DIY Foam Tape, Tim Holtz Tiny Attacher.

 4.  Hello Dude Card.  The solid stamps are perfect for stamping directly on the patterned paper.


Other Supplies: Xyron Mega Runner, DIY Foam Tape, Banner Pennant Stamp (Stampin' Up), WRMK Corner Rounder, Brads (Oriental Trading Company), WRMK Corner Rounder, Tim Holtz Tiny Attacher, Uni-ball Signo Broad White Gel Pen.

5.  Hero Card.  I love a simple one layer card.  Add some mustache washi tape and you have perfection in my book!


6.  You Are Amazing Card.  This card was a lot cooler in my head.  The ties in the top corner were supposed to look like pennant strips.  Note so much.  But I do like how the "You Are" sentiment looked inside that banner stamp by Stampin' Up.


Other Supplies: Xyron Mega Runner, DIY Foam Tape, Banner Stamp (Stampin' Up), WRMK Corner Rounder.

As always, thanks for stopping by!

Sunday, June 9, 2013

Xyron and Epiphany Crafts Blog Hop


It's time for another amazing blog hop with Xyron and this week they are teaming up with Ephiphany Crafts!!!!!  I am a tool and gadget junkie when it comes to my crafting and the tools by Ephiphany Crafts are a MUST HAVE STAPLE for any DIYer.  With their amazing tools, you can customize anything from simple embellishments to even jewelry charms.

A.  Photo Charm.  The first project I have is a super simple but cute ribbon necklace I made for my daughter.


Supplies:  To make this necklace, you will need the following supplies:  Xyron 1.5" Create-a-Sticker (Permanent Adhesive); Ephiphany Crafts (Shape Studio Tool Heart 25, Bubble Caps Heart 25, Metal Charms Heart 25); American Crafts Ribbon.

1. Size Down and Print Your Photos.  Choose a photo that is approximately 28 mm x 28 mm large (to fit inside the heart shape of the Epiphany Crafts Shape Studio Tool Heart 25).  Note: I resized my image in Photoshop and then printed them at home using photo paper.


2.  Punch Out Photo/ Image.  Using the Ephiphany Crafts Shape Studio Tool Heart 25, cut out a heart shape from the photograph.


3.  Adhere the Bubble Cap.  Leave the heart shape inside the heart tool, place a heart bubble cap on top of the image and inside of the tool, and then close the lid and press down to adhere the bubble cap onto the photograph.


4.  Apply Adhesive onto the Heart Bubble.  Run the heart bubble through the Xyron 1.5" Create-a-Sticker.


5.  Place Heart Bubble into Charm Setting.  By simply removing the adhesive backing from the heart bubble, you can then simply place the heart inside the Ephiphany Crafts Metal Charm Setting to create the most adorable and customized charm!


Since I'm not a jewelry maker, I simple ran a piece of cute ribbon through the charm to create a super cute necklace for my daughter.  And since it was so easy, I was able to quickly make a second one for her to give to her friend.


B.  Custom Embellishments for Cards.  I also love how the Ephiphany Crafts tools let me fully utilize my digital scrapbooking supplies to make custom embellishments, perfect for scrapbook layouts or cards.  For these next two cards, I printed some digital stamps (in coordinating colors with my patterned paper) on matte photo paper to make these flair-like circle embellishments.


For my other supplies, I stuck with my Simon Says Stamp June Card Kit (which I am a brand new subscriber to).  I also created some smaller circle embellishments by cutting out images from the patterned paper with the Epiphany Crafts Studio Shape Tool Round 14.

1.  You're the Best Card.  


Supplies:  Ephiphany Crafts (Studio Shape Tool Round 25 and 14, Bubble Caps Round 25 and 14); Adhesives (Xyron 1.5" Create-a-Sticker, Xyron Mega Runner); Patterned Paper and Die Cuts (Basic Grey - Hipster Collection); Stamps (Amuse Studio); Wood Veneer (Freckled Fawn); Heart Sequin and Brad (Doodlebug Designs); Hello Word Art (Splendid Fiins - Spot On).

Here is a close up of the custom embellishments (which easily fit through the Xyron 1.5" Create-a-Sticker).


2.  Where in the World Card.  


Supplies:  Epiphany Crafts (Studio Shape Tool Round 25 and 14, Bubble Caps Round 25 and 14); Adhesives (Xyron 1.5" Create-a-Sticker, Xyron Mega Runner); Patterned Paper and Die Cuts (Basic Grey - Hipster Collection); Stamps (Kelly Purkey - Dude); Wood Veneer (Freckled Fawn); Hello Word Art (Splendid Fiins - Spot On).

With the "hello lovely" circle, I used the Round 25 tool as just a circle punch and opted not to cover it in a bubble.  I love it when my tools have multiple functions!  And here is a close up.


Remember to stop by the Xyron Blog and Xyron Facebook Page all week to see what other awesomeness and giveaways are going on!

As always, thanks for stopping by!

Tuesday, June 4, 2013

Simple Scrapper - June 2013 Blog Hop

 
It's time for another blog hop to share the scrapbook layouts I created inspired by sketches and story starters available through the Simple Scrapper Premium Membership.

1.  Books on Bases Layout.  I used my May Counterfeit Kit for this layout.  Using a sketch from the June Simple Scrapper Premium Membership, this came together in no time!


Supplies:  Sketch (Simple Scrapper Premium Membership), May 2013 Counterfeit Kit, Cardstock (Joann's), Punches and Dies (Fiskars, Lifestyle Crafts); Adhesives (Xyron Mega Runner).

I love the look of a simple single punch along the edge of a layout using a border punch.  Goodness knows I have enough of those border punches.  :)


And I love those blue glittery thickers from American Crafts.  Who am I kidding, I love any and all thickers!


2.  Pumpkin Patch Train.  This layout is inspired by a story starter in the June Simple Scrapper Premium Membership and also uses a Simple Scrapper template. 


Supplies:  Template (Simple Scrapper); Digital paper and elements (Design by Dani).

GIVEAWAY!!!  Use the Rafflecopter widget below to enter a giveaway for a one month trial membership at Simple Scrapper. There are three ways to enter and three winners will be selected. To be eligible, you must enter by 11:59pm CDT on Wednesday, June 5.

a Rafflecopter giveaway


Now be sure to visit the other Design Team Member blogs for more inspiration from Simple Scrapper!

Van Nguyen  YOU ARE HERE

As always, thanks for stopping by!!

NOTE:  The Premium Membership at Simple Scrapper provides skills and shortcuts to help you simplify and find more meaning in your memory keeping. Each month members receive a new collection of sketch templates and Story Starters, story-focused prompts for pages and projects.
 

Friday, May 31, 2013

Tutorial - Glow in the Dark Stars

Those who follow this blog know how much I absolutely adore my Xyron adhesive machines for everything from scrapbook layouts to craft projects with Charlotte.  I was reading this Fancy Nancy book to Charlotte the other night and it got me thinking...hey, I can make glow in the dark stars!  So if you want to make your as well, here's a little tutorial.


You will need the following supplies:  Cardstock, Xyron 2.5" Create-a-Sticker (Permanent Adhesive and Repositional Adhesive), Glow in the Dark Glitter.


1.  Cut Out Star Shapes.  Either by hand or using some sort of die cutting machine, cut out star shapes from the cardstock.  I used these Xyron/ Spellbinder Dies and ran a few pieces of scrap cardstock through my Xyron Creatopia - Shapez Component.


2.  Adhere Permanent Adhesive on Stars.  Using a Xyron machine fitted with permanent adhesive (I used my 2.5" Create-a-Sticker), cover each star shape with adhesive.


3.  Cover Stars with Glitter.  Carefully peel each sticker off of the backing and then cover with glitter.  For some tips on how to do this, check out this Xyron Video.


4.  Adhere Repositional Adhesive on Stars.  Finally, adhere repositional adhesive on the non glittered side of each star.  I used my Xyron 5" Creative Station with Repositional Adhesive but Xyron makes repositional adhesive cartridges for almost all of their machines.  Also, remember to place the glittered side of the star facing up.  This effectively creates a wall sticker!!


5.  Adhere Stickers to Wall.  Finally, stick those stars onto the wall...


...and turn off the lights!  Glow in the Dark Stars!!!!


As always, thanks for stopping by!!!

Thursday, May 23, 2013

May Counterfeit Kit Challenge - Lazy Weekend Mornings Layout and some cards

I just wanted to quickly share a layout and some cards I made using my May Counterfeit Kit.  It felt so good to just craft with no particular agenda or purpose. And as always, it feels great to work away at my stash.

1.  We Love Lazy Weekend Mornings Layout.  I adore the weekends, especially when Justin is home and we get to all sleep in a little bit longer.


Supplies:  May Counterfeit Kit, Lifestyle Crafts Doily Die, Xyron Mega Runner, DIY Foam Tape.

And here is a close up of the title.  I love mixing up my letter stickers.  Goodness knows I have enough of them.  Sigh...  :)


2. Ahoy Boy Card.  This card is for a good friend that just had another boy.  I need to get this bad boy in the mail along with this super cute outfit I bought the other day.
 

Supplies:  May Counterfeit Kit; Stamps (My Cute Stamps - Ahoy); Inks (Jenni Bowlin Studios, Tim Holtz); Punch (WRMK); Adhesives (Xyron Mega Runner, DIY Foam Tape).

3.  Celebrate Card.  I love how easy it is to use this stamp set from Papertrey Ink to make a card for any type of celebratory occasion.


Supplies:  May Counterfeit Kit, Stamp and Die (Papertrey Ink - Celebrations, WRMK); Ink (Jenni Bowlin Studio, Versafine); Xyron Creatopia - Shapez Component; Adhesives (Xyron Mega Runner, DIY Foam Tape).

4.  Thank you Card.  I used the circles in the patterned paper to frame these cute little punched hearts.  Can someone say...use up your scraps!


Supplies:  May Counterfeit Kit, Punchs (Fiskars, WRMK); Adhesives (Xyron Mega Runner, Xyron 1.5" Create a Sticker).

5.  Smiles Card.  And this final card is for my amazingly dear and talented friend, Misty.  Out of the blue, she sent Benjamin the sweetest card and outfit.  So, Misty, this one is coming in the mail to you very very soon.  I love you dearly, my friend.


Supplies:  May Counterfeit Kit, Stamp (Lawn Fawn - Many Thanks); Ink (Jenni Bowlin Studio); Tim Holtz Tiny Attacher; Punch (WRMK); Adhesives (Xyron Mega Runner, DIY Foam Tape).

If you haven't already, make sure to check out the Counterfeit Kit Challenge Blog.  It's a great way to use up that stash of yours!

As always, thanks for stopping by!
Related Posts Plugin for WordPress, Blogger...